My blogging setup with org-mode and ox-hugo
- State “DONE” from “TODO”
I have recently published my blog, but have been writing for some time: study notes, snippets, tutorials, thoughts. My writing almost exclusively happens in emacs, specifically spacemacs. I use org-mode for writing and organizing my notes. I have been using spacemacs for years now and it feels like a second home to me. Funnily, since the advent if AI I use org-mode even more - turns out keeping things in plaintext is really cool (as we all have known for some time now, right?). Finally I have decided to publish my thoughts and ideas, more as a braindump and easily accessible archive than anything else. This post aims to describe the tools I use and my setup to publish to my blog.
In short:
- Writing: Spacemacs, org-mode
- Exporting: ox-hugo
- Publishing: Codeberg and Hugo
Let’s dive into it.
Writing with Spacemacs and org-mode
Like mentioned above: I have been using Spacemacs for years now, so it feels like home to me. These days I use spacemacs and org-mode for almost anything - note taking, organizing tasks and Todos, programming, writing emails calendar management. The list goes on.
However, I have had ups and downs. In the beginning I spent a lot of time in my .spacemacs trying to finetune my dotfiles. It is fair to say that I spent way more time working on my setup than actually using spacemacs. Was it productive? Most probably not. Did I learn anything? Yes, but not what I was going for initially. I learnt a lot about lisp and emacs config though.
Later, I had a lull when I found it hard to integrate org-mode with my mobile workflow and the necessary evil of using Windows-based workflows at work. Dealing with org-mode files on mobile devices is clunky at best.
However, now I have gravitated to spacemacs again. I have implemented some IDE tools to handle basic programming tasks and set up a caldav based pipeline to keep track of my TODOs via a (self-hosted) calendar on nextcloud. This brings my TODO workflow from org-mode and the agenda view onto my phone. I have also created a pipeline (via n8n) to just drop notes via nextcloud notes into my org-mode workflow which is helpful for quickly dropping an idea or a small project into org on the go.
I started out with many different files, also playing with things like org-brain to work with a structured graphs of files. However, gradually and over time i have gone back to simplifying things. Nowadays, I work with just a couple of files: an organizer.org which does the heavy lifting and where I keep track of projects, TODOs etc. Then I have one separate blog.org file which has a list of my draft articles for this blog and via which I do the exporting to this blog. I also have an inbox.org file for taking care of the imports via n8n from mobile. Generally, for separate webpages and projects I tend to new files now.
| Org-mode file | Rationale |
|---|---|
| organizer.org | Main driver, storage file and catch-all for TODOs, small projects, goal tracking etc |
| blog.org | This blog, org file for writing and exporting files |
| inbox.org | Landing place for the Android -> n8n -> org-mode pipeline |
Here is a shoutout to some of the resources I used extensively in the beginning:
- Nick Anderson’s Level up your notes with Org , which contains useful tips and configuration tricks.
- Sacha Chua’s Some tips for learning Org Mode for Emacs , her Emacs configuration and her other articles .
- Rainer König’s OrgMode Tutorial video series .
I am planning a “literate config files” series (stay tuned) and all recent posts in this blog are written using org-mode (you can find the source file in Codeberg).
Exporting with ox-hugo
When I first started writing my blog posts in org-mode, I relied on Hugo’s built-in support for it, which allows you to simply create posts in .org files instead of .md and have them parse in org-mode format. Unfortunately, the support is not perfect. Hugo relies on the go-org library which, while powerful, does not support the full org-mode markup capabilities, so many elements are not rendered or processed properly.
Happily, I discovered ox-hugo, an org-mode exporter which produces Hugo-ready Markdown files from the org-mode source, from which Hugo can produce the final HTML output. This is a much better arrangement, because each component handles only its native format: ox-hugo processes the org-mode source with the full support of org-mode and Emacs, and Hugo processes Markdown files, which are its native input format. I can now use the full range of org-mode markup in my posts, and they will be correctly converted to their equivalents in Markdown. Furthermore, source files remain output-agnostic, as I can still use all other org-mode exporters if I need to produce other formats.
Ox-hugo supports two ways of organizing your posts: one post per org file, and one post per org subtree. In the first one, you write a separate org file for each post. In the second, you keep all your posts in a single org file, and specify (through org-mode properties) which subtrees should be exported as posts. The latter is the recommended way to organize posts. At first I was skeptical - who wants to keep everything in a single file (just joking)? However, as I have worked more with it, I have come to realize its advantages. For one, it makes it easier to specify post metadata - for example, I have defined sections in my org-mode source file for certain frequent topics, and those are tagged accordingly in the org source. When I create posts as subtrees of those sections, they inherit the top-level tags automatically, as well as any other properties, which I use, for example, to define the header images used in the posts. Having all posts in a single file also makes it easier to share other content, such as org macro definitions, ox-hugo configuration options, etc.
Note that ox-hugo is not limited to exporting blog posts, but any content processed by Hugo. For example, my org source file also includes all the static pages in my web site - they are differentiated from blog posts simply by the Hugo section to which they belong, which is defined using the HUGO_SECTION property in my Org file.
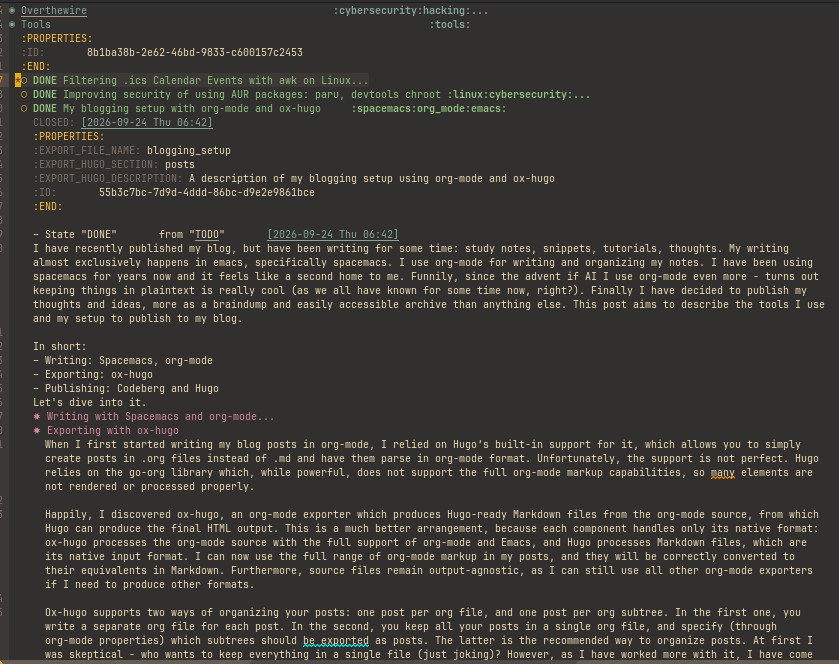
Figure 1: Org tags for tagging Posts
Since the full power of org markup is available when using ox-hugo, you can do interesting things. For example, the plan for my Literate Config Files series is that all the posts in this category are automatically updated every time I export them with the actual, real content of the corresponding config file, which I also keep in org format. There is a lot of hidden power in org-mode and ox-hugo. My recommendation is to go through the source files for some of the websites listed in ox-hugo’s Real World Examples section. I have learned a lot by reading through the source files for the ox-hugo website itself.
Once you have some contents in your Org file, you can export them into Markdown files. This is as easy as hitting up the standard Org export dispatcher (C-c C-e) and export to Hugo-compatible Markdown (H A). Ox-hugo knows the default structure expected by Hugo (a top-level content/ directory in which you have directories for each section), so there’s usually not much to do other than point ox-hugo to where your top-level Hugo directory is, using the HUGO_BASE_DIR property.
Hugo has extensive capabilities and it is beyond the scope of this article to show you how to use it, but it has very good documentation. Normally I run hugo locally to make sure the export is OK, particularly when I’m tweaking with my sites’ theme or settings. To do this, you can simply run:
hugo server And browse to http://localhost:1313 .
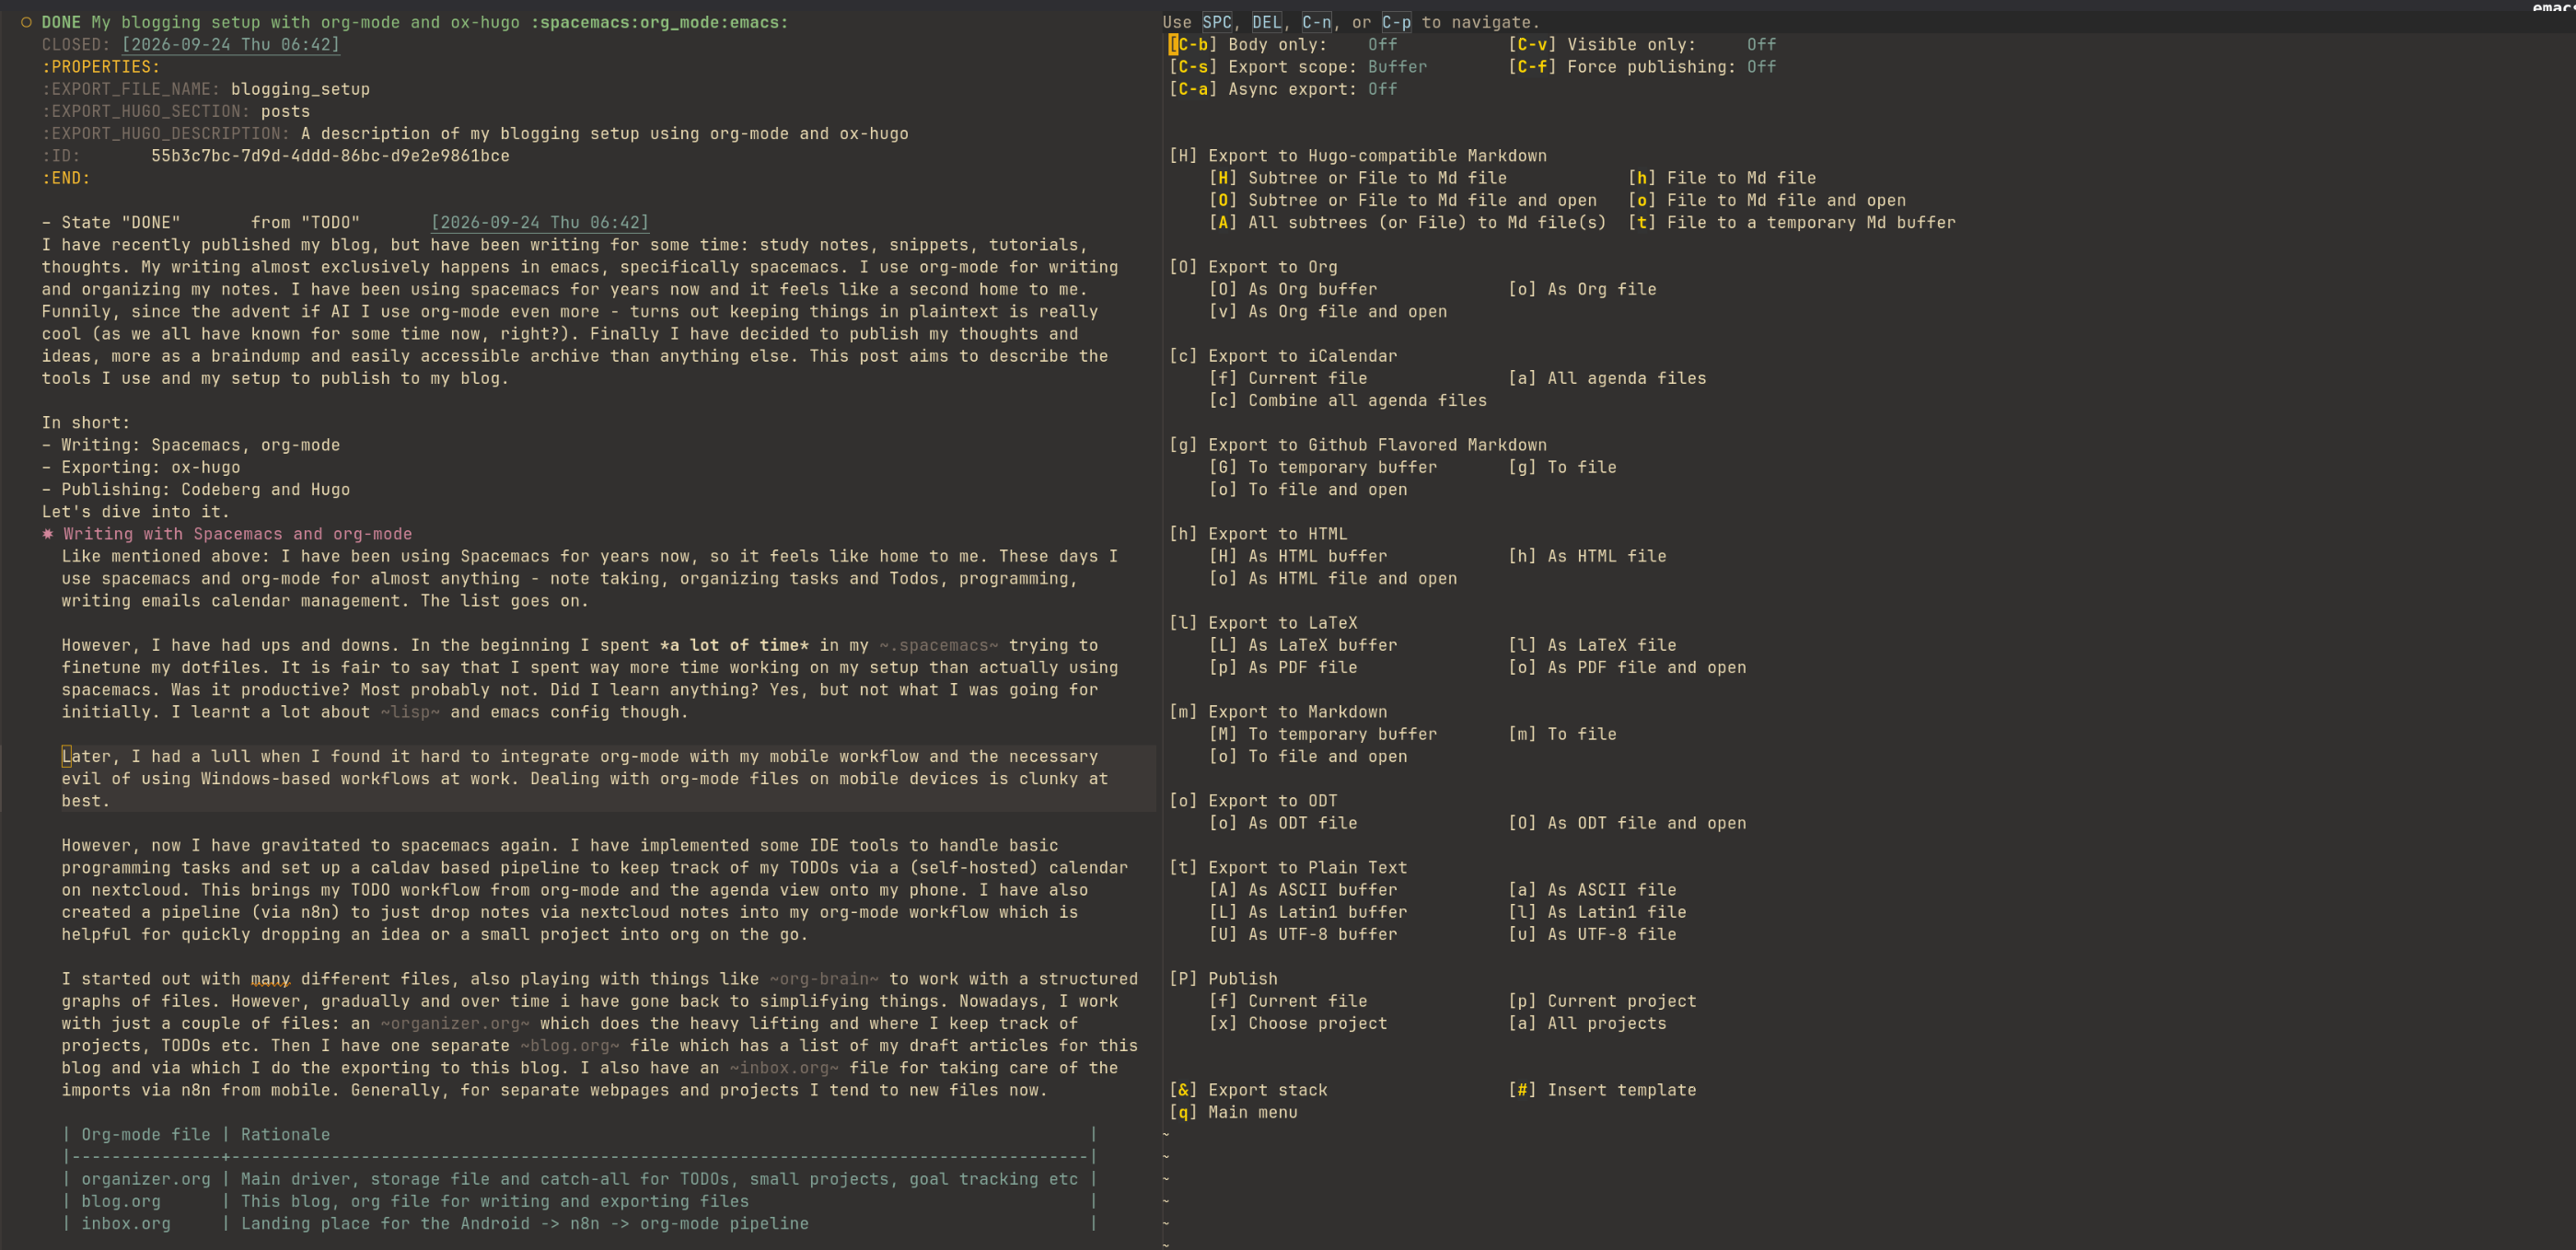
Figure 2: Org export dispatcher for Hugo
Publishing with Hugo, Codeberg and Forgejo
Once you are happy with the results, comes the question of publishing the website. I used GitHub Pages for a while, but have since switched to Codeberg and a small Hetzner VPS.
The pipeline is a single Forgejo Action, defined in .forgejo/workflows/deploy.yml in the site’s repo, triggered on every push to master:
- Checkout the repo, including the theme (it’s a git submodule, so submodules have to be checked out explicitly)
- Install the latest Hugo extended release
- Build the site with
hugo --minify - Rsync the generated
public/directory straight to the VPS over SSH
The SSH auth is a dedicated deploy key stored as a Codeberg Actions secret - it never touches my own keys, and it only has access to this one repo, not my account.
on:
  push:
    branches:
      - master

jobs:
  deploy:
    runs-on: codeberg-small
    steps:
      - uses: actions/checkout@v4
        with:
          submodules: true
      - name: Build
        run: hugo --minify
      - name: Deploy
        run: |
          rsync -avz --delete -e "ssh -i ~/.ssh/deploy_key" \
            public/ root@<SERVER_IP>:/var/www/dev-initely.me/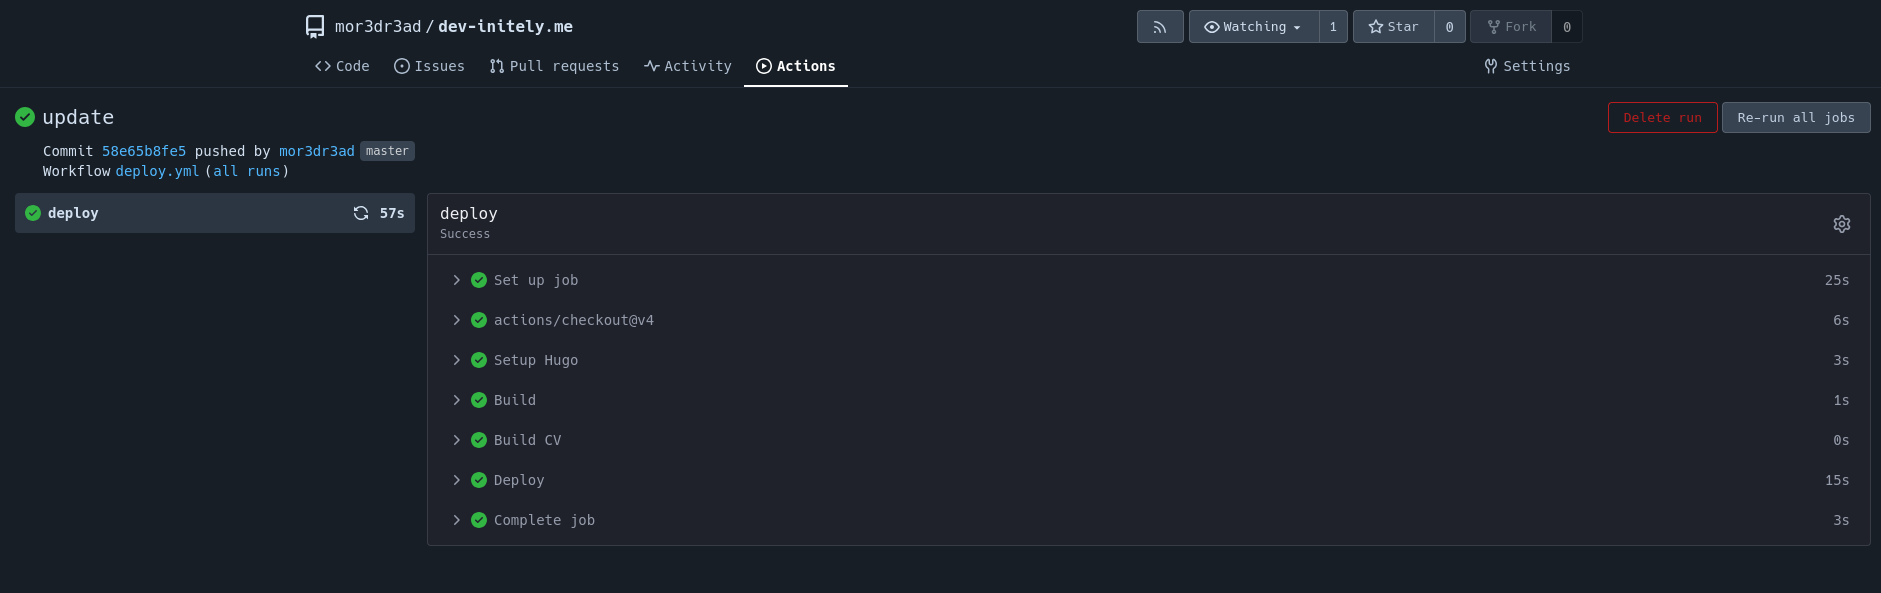
Figure 3: Deploy pipeline in Codeberg via ForgeJo
So end to end, publishing a post comes down to: export with C-c C-e H A, then stage, commit and push with Magit. No manual build step, no server login required for a routine post - Codeberg’s runner builds it, and the VPS just serves static files behind nginx with a Let’s Encrypt certificate.